

How to Post Jobs, Manage Proposals, and Pay Freelancers
Managing your project on Serpworks is straightforward. Follow this guide to post your job, manage incoming proposals, communicate progress, release milestone payments, and leave feedback. Whenever there's an update, check the bell icon in your top-right navigation header for real-time notifications.
Step 1: Access the Job Creation Page
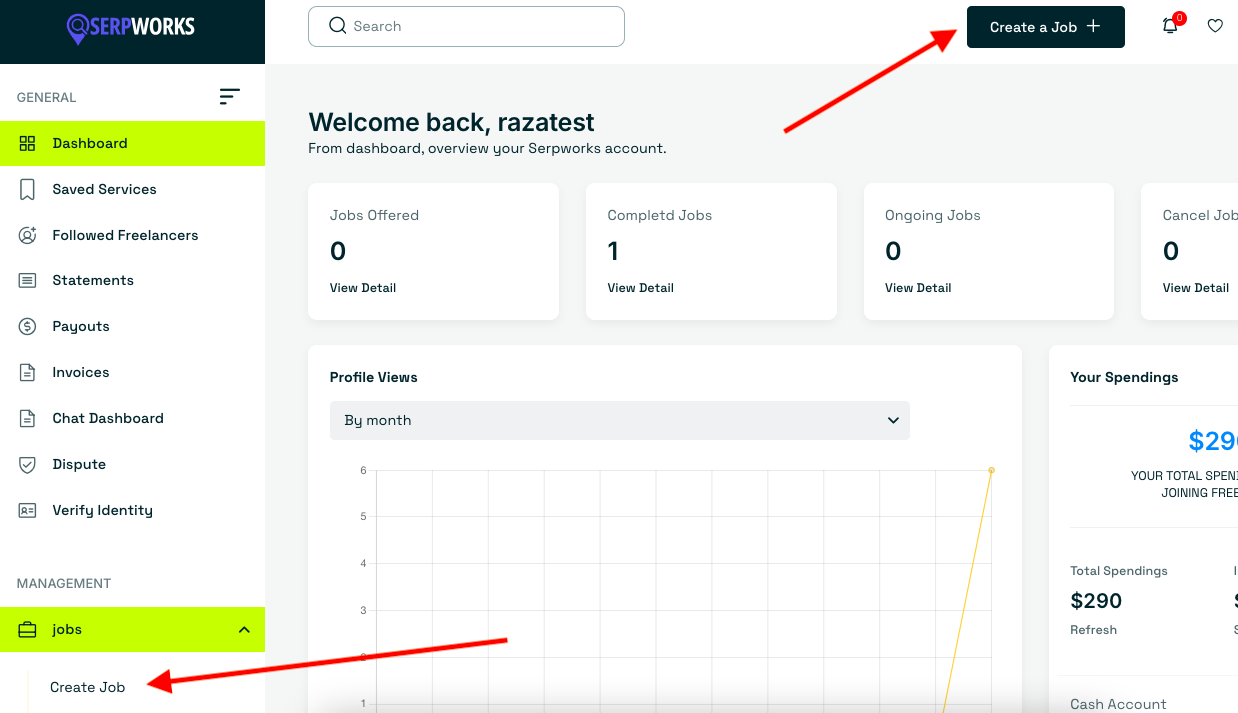
Log in to your account and open the job creation page using either method:
- Click the Create a Job button in the top-right corner of your dashboard.
- Navigate using the sidebar menu to Jobs > Create Job.
Step 2: Fill Out Job Details & Post
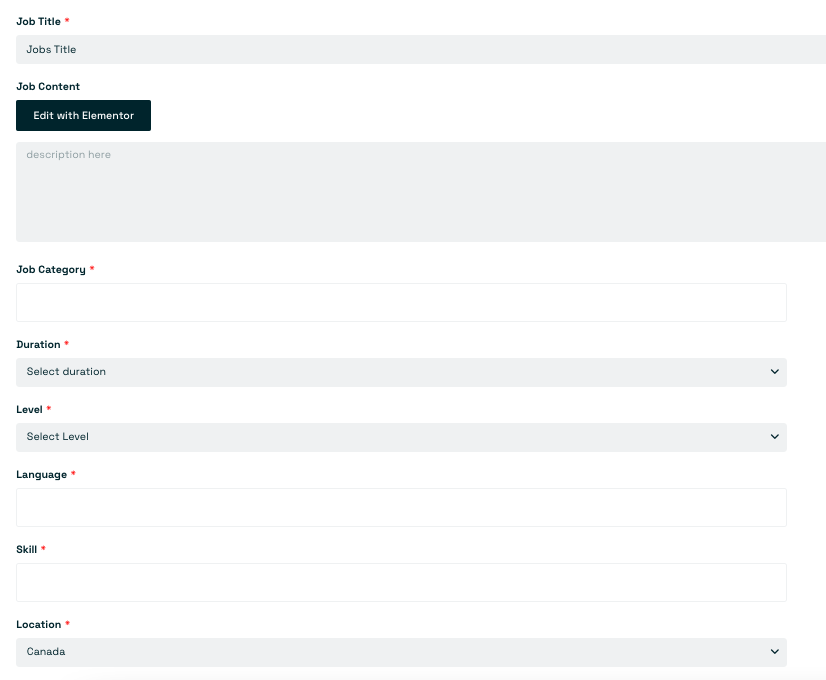
Enter your project specifications and requirements:
- Core Info: Enter a Job Title, write clear Job Content describing your project, and choose the correct Job Category, Duration, Level, Language, Skill, and Location.
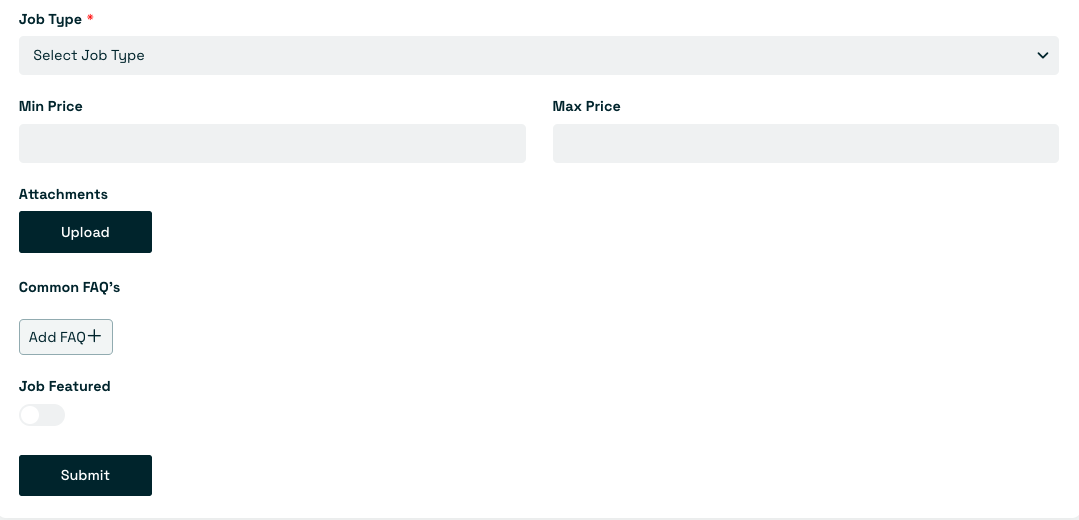
- Budget & Type: Select your Job Type (Hourly or Fixed) and set your minimum and maximum budget ranges. Note: Hourly hiring is typically milestone-based, allowing you to pay according to your project timeline and mutual agreement with the freelancer.
- Additional Features: Upload attachments, add Common FAQs, or check Job Featured if you want extra visibility for your listing.
- Publish: Once all details are complete, click Submit to post your job.
Step 3: Manage Your Posted Jobs
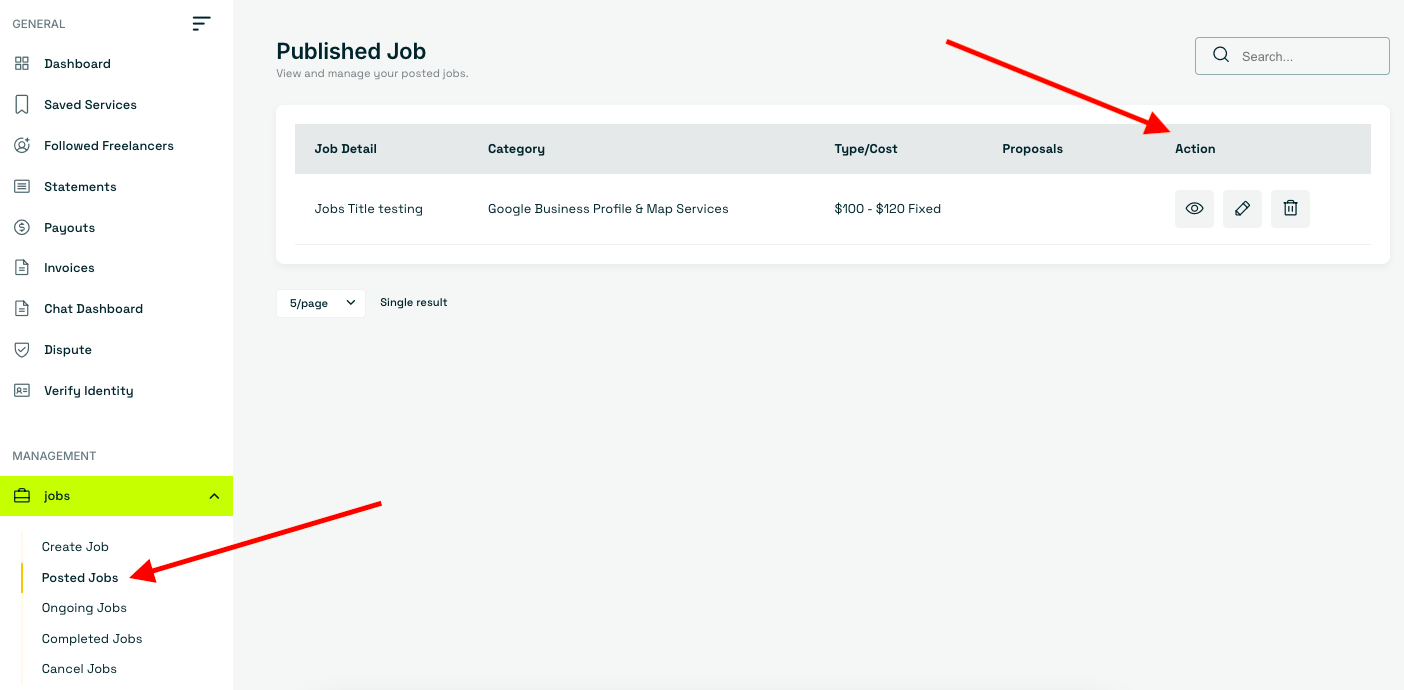
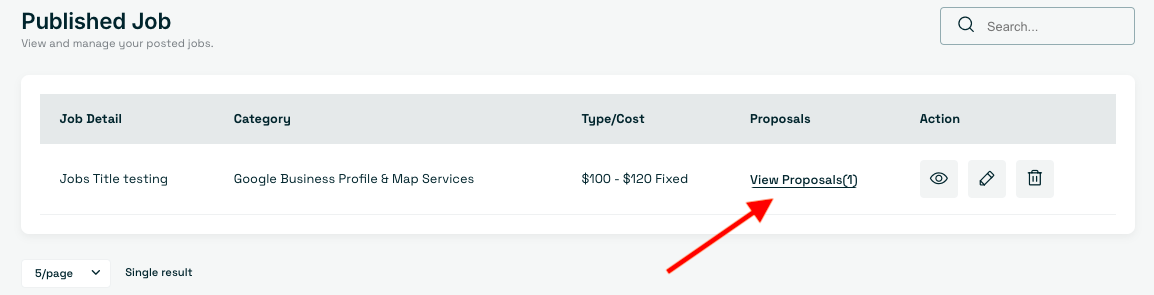
To monitor your active listings, navigate to Dashboard > Jobs > Posted Jobs. Here, you can track incoming proposals or use options to View, Edit, or Delete your job posting.
Step 4: Review Proposals & Interview Candidates
When a freelancer submits an application:
- View all received submissions directly from your posted job list.
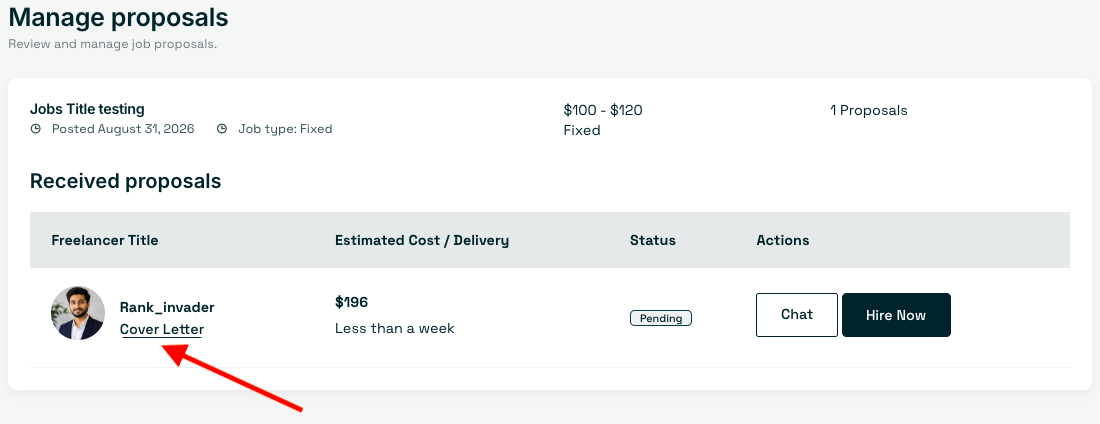
- Click View Proposal to open the full application details.
- Review cover letters and attachments, start a direct Chat with the freelancer, or proceed to Hire them.
Step 5: Deposit Funds & Hire the Freelancer
Before hiring, ensure you have sufficient funds in your wallet:
- Need to add funds? Follow our step-by-step guide on How to Deposit Funds to Wallet.
- Once funded, click Hire Now on the candidate's proposal.
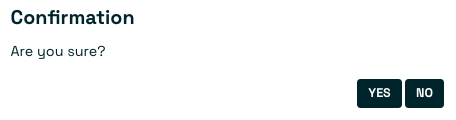
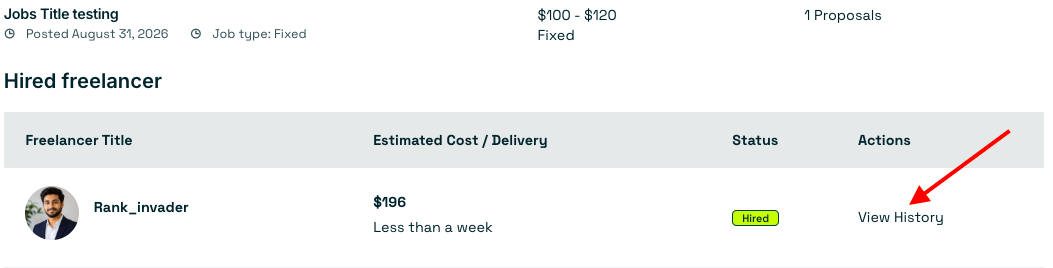
- Confirm by clicking Yes in the confirmation popup box. The job status will change to Hired.
- To open the project workspace, click View History on the page or navigate to Dashboard > Jobs > Ongoing Jobs > View History.
Step 6: Navigate the Job History Workspace
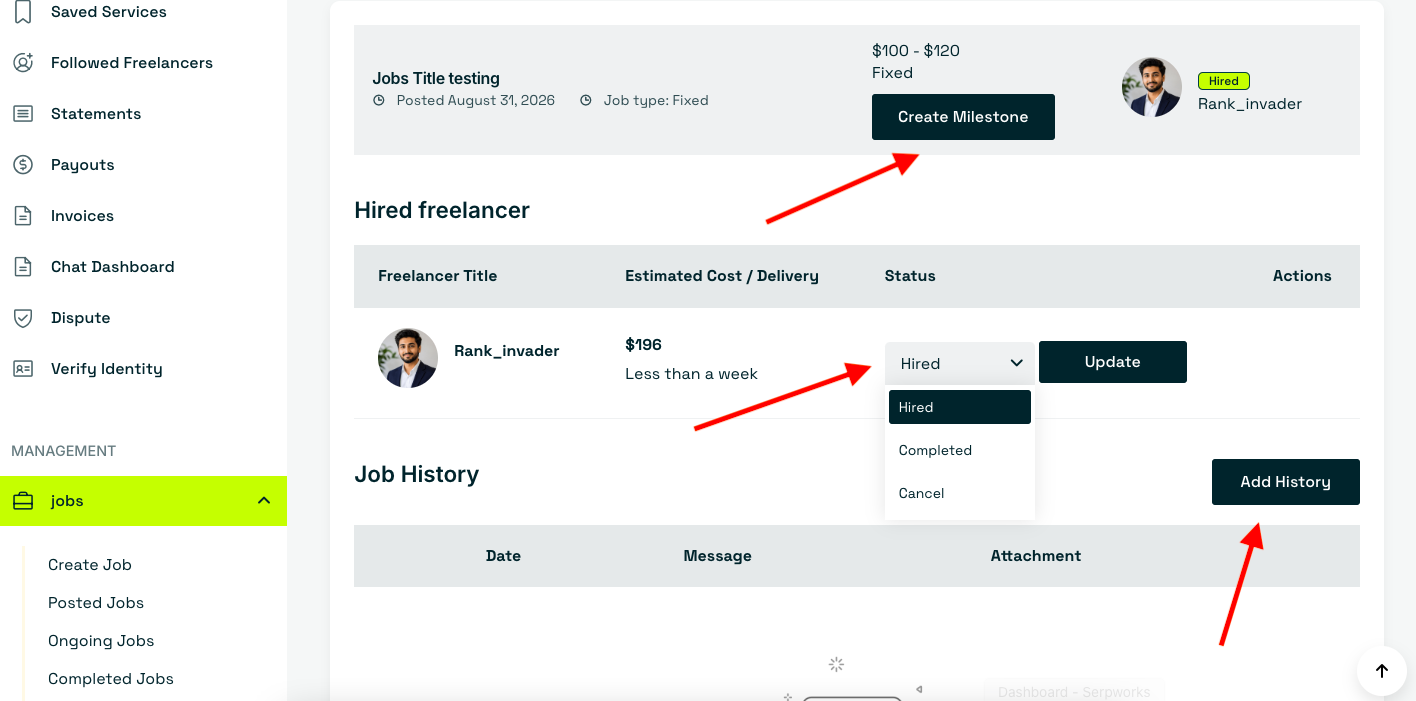
The Job History page serves as your central project workspace with three primary controls:
- a) Create Milestone: Click Create Milestone when an agreed-upon project phase is reached.
- b) Job Status Dropdown: This defaults to Hired while the job is active. Update this status only when necessary:
- Completed: Select when all work is finished and approved.
- Cancelled: Select if you need to end the project early. Click Update to apply.
- Cancellation Note: Canceling releases funds from Serpworks Escrow back to your wallet (minus service fee deductions) after approval from our team, who may contact you for details.
- c) Add History: Click Add History to send progress updates, deliver files, or respond to freelancer requests shown in the history log below.
Step 7: Create & Pay Milestones
To release a structured payment:
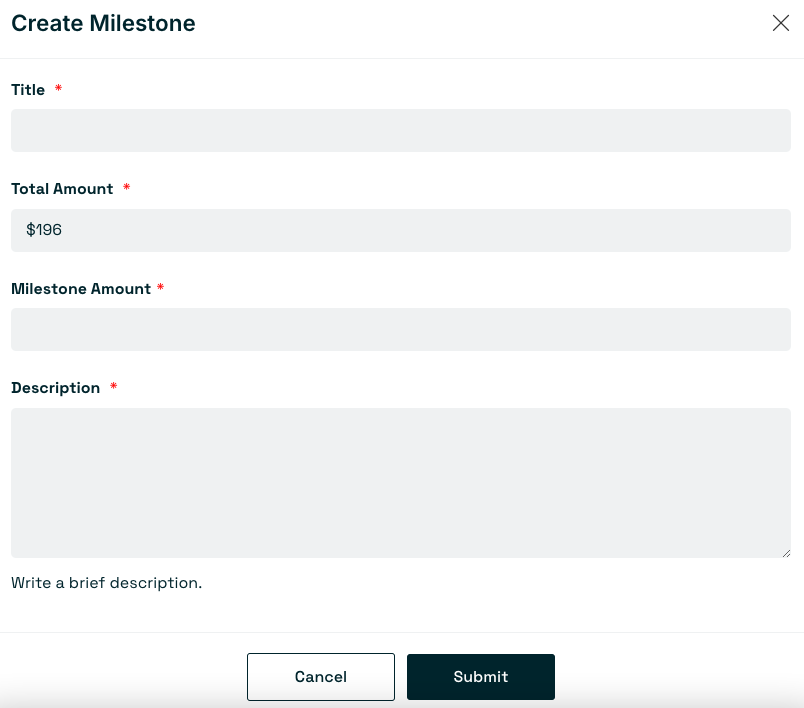
- Click Create Milestone to open the milestone form.
- Review the Total Amount for Job and enter a milestone Title and Milestone Amount. Add a description if needed, then click Submit.
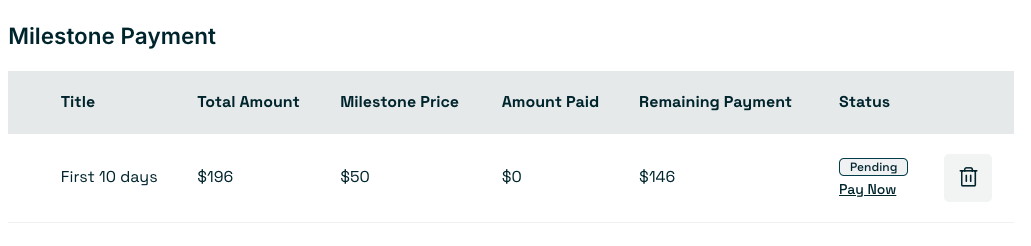
- You will see a "Milestone created" alert. Scroll to the bottom of the Job History page to see the new milestone listed as Pending along with your remaining balance.
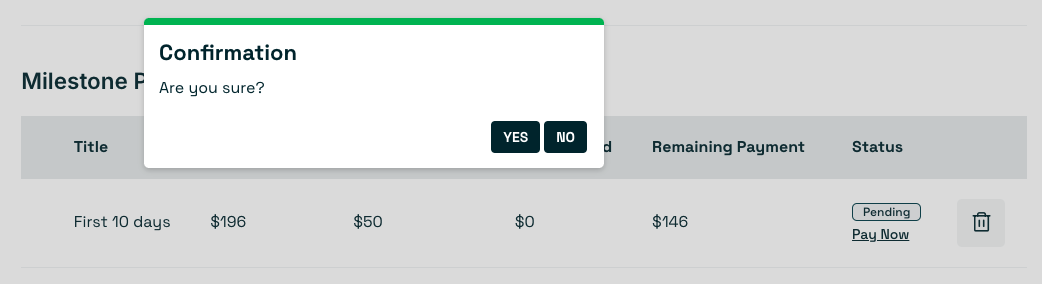
- Verify all details. If correct, click Pay Now. (If you made a mistake, click the Bin Icon to delete it and create a new one).
Step 8: Confirm Milestone Payment Status
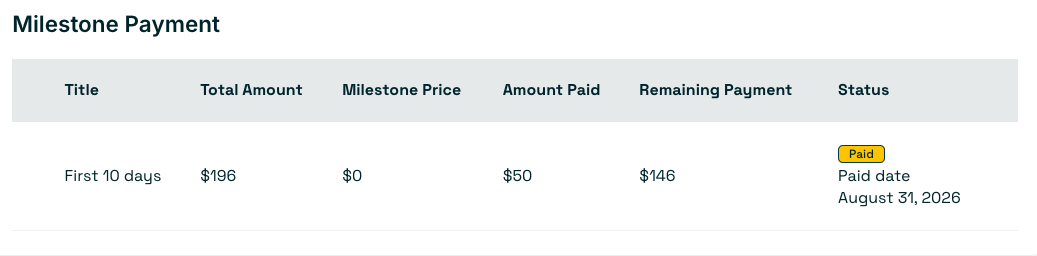
Once paid, the page will refresh automatically. The milestone entry will update to Paid, displaying the total amount, amount paid, and transaction date.
Step 9: Post Updates & Deliverables
To send messages or project files to the freelancer:
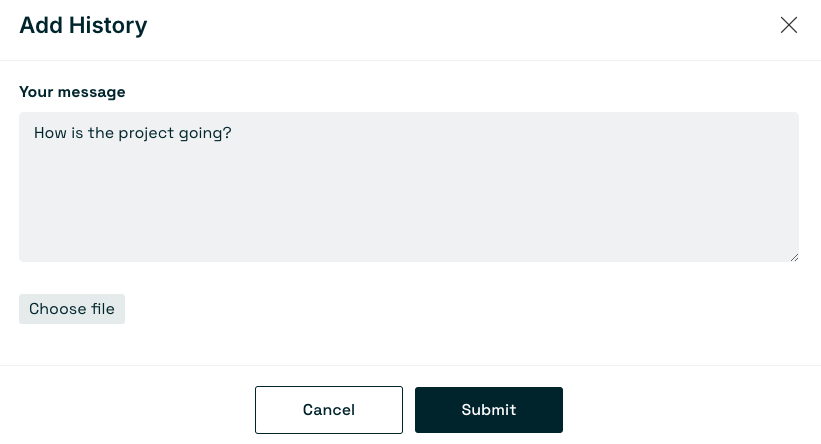
- Click the Add History button (Option c in Step 6).
- Type your message, attach any relevant files, and click Submit.
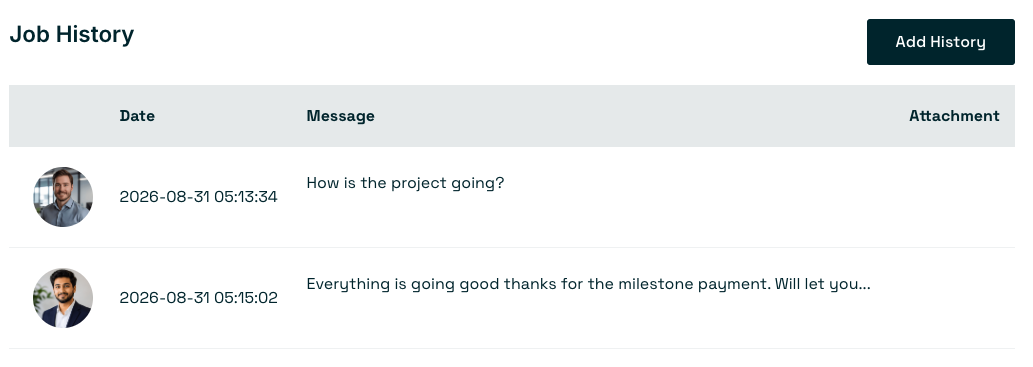
- Both client and freelancer messages will display in chronological order under the Job History tab.
Step 10: Mark Job as Completed
When all deliverables are finished and verified:
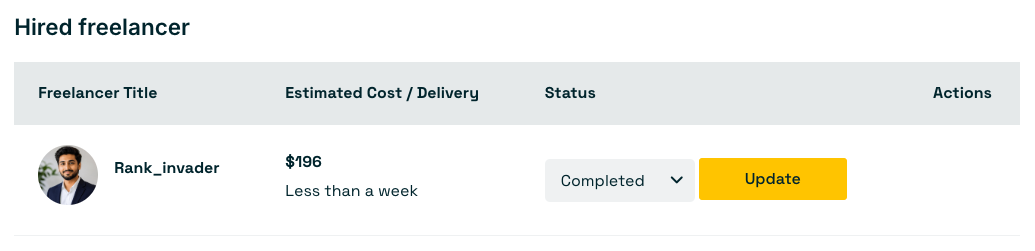
- Change the job status dropdown to Completed and click Update.
- Important: Recheck all work thoroughly before marking complete. Once marked completed, Serpworks will process fund releases to the freelancer. Ensure all tasks are fully delivered to your satisfaction.
Step 11: Leave Freelancer Feedback & Ratings
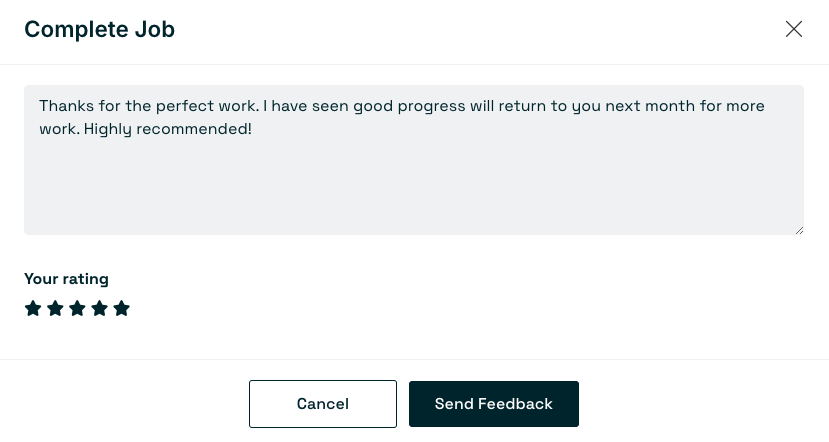
After marking the job complete, a feedback window will appear:
- Provide a star rating and write a written review for the freelancer, then click Submit Feedback.
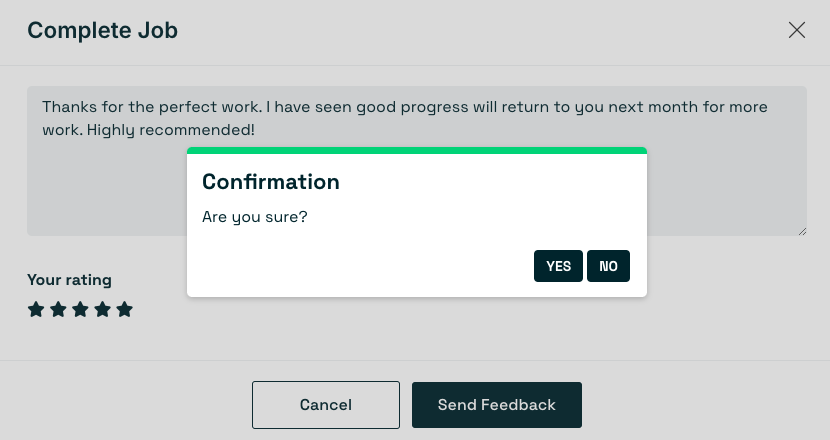
- A confirmation box will appear. Click YES to finalize or NO to edit your review.
- Once confirmed, you will see a "Submitted review successfully" notification.
Step 12: Access Archived Files & Wallet Statements
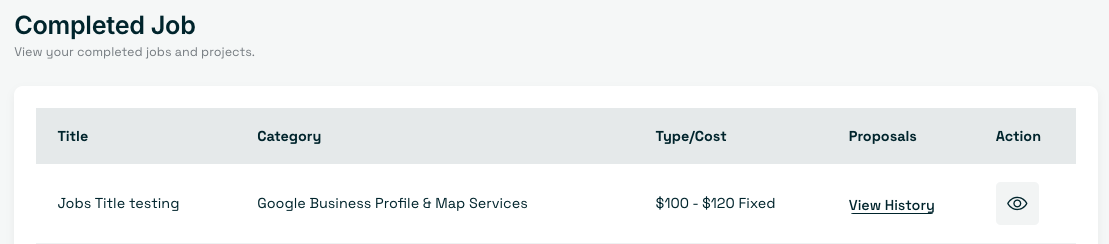
- Work History: View completed files and project records anytime at Dashboard > Jobs > Completed Jobs > View History.
- Billing Details: Track wallet balances, transactions, and statements at Dashboard > Statements.

Frequently Asked Questions
What happens to my funds if I have to cancel an ongoing job?
If a project is cancelled, funds held in Serpworks Escrow are released back to your wallet balance after approval from our support team (minus standard service fee deductions).
Can I adjust or delete a milestone after creating it?
Yes. Before submitting payment, you can remove any incorrect milestone by clicking the Bin Icon next to it under the Pending status section on your Job History page and then creating a new one.
Is fund release to the freelancer automatic once I mark a job completed?
Yes. Changing the job status to Completed triggers fund release to the freelancer. Be sure to carefully review all completed deliverables and files before updating the status to Completed.
Ready to Start Your Project?
Post your job today on Serpworks and connect with top freelancers to bring your project to life.
Create a Job Now